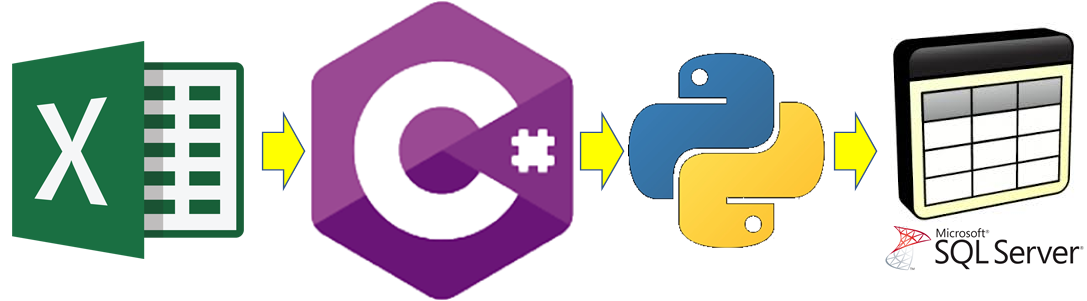
In this exercise we will create a simple Web Application just to upload an excel file and send it to a python program.
We will implement this solution to perform the steps described in the flowchart below.
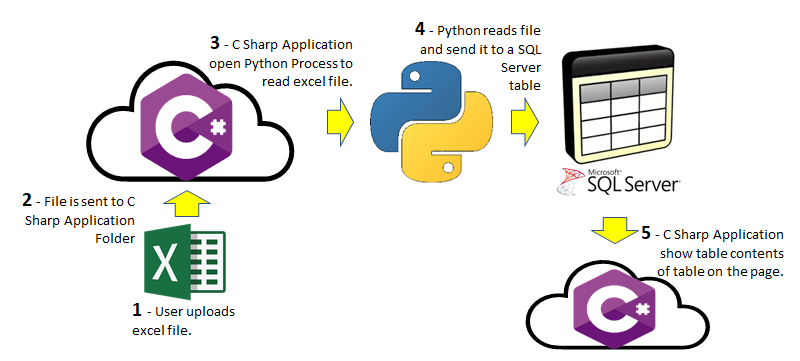
1 – The user will upload a file to application
2 – The file will be sent to a folder on the application server
3 – The C Sharp Application will start a process to run a python program which will read the file.
4 – Python open the excel file on Application folder, change its contents (multiply by ten) and insert its contents into a SQL Server Table.
5 – C Sharp application read the SQL Server Table and show its contents on the page.
Let’s see together all those steps in details.
1 – UPLOAD FILE
The Excel File
The excel file is defined as the picture below:

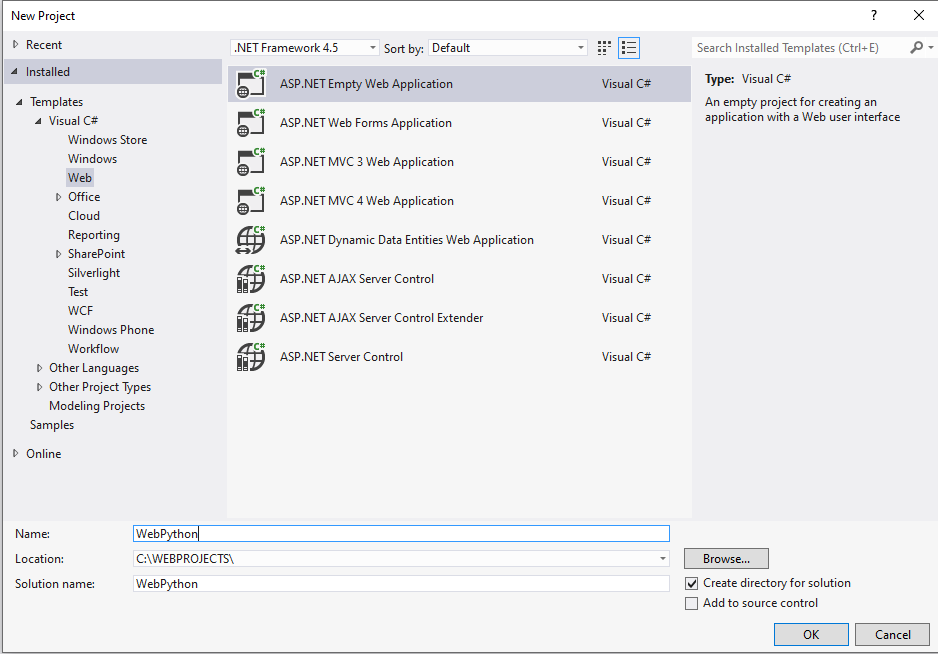
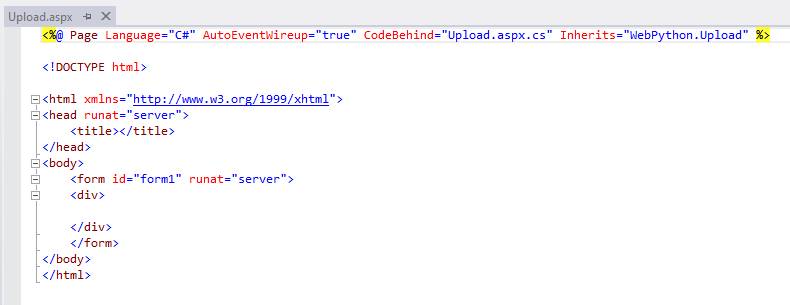
First, we need to create a web application which will provide the interface with the user. This interface will be a simple Aspx HTML page.
So, open visual studio and next create a new project.

Give a name to your project and saved in a location. Remember that this location will be referred by the python program when it comes to read the excel file.
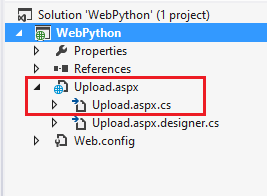
After defining you project name and location, on the Solution Explorer, right click the application folder to add a WebForm.
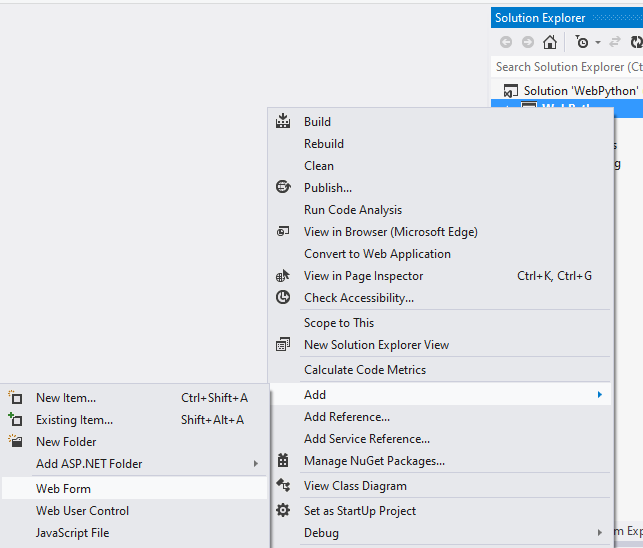
Give a name to your WebForm and click OK.

After that, we will have a WebForm as shown in the picture below:
We have to work on the two files, we need to set the visual objects on the aspx and handle these visual objects on the cs file.
First, we will work on the aspx file in which we will include an object to upload file, an buttom to start the python processing and a gridview to show the results.
ADD UPLOAD FILE object.
On the toolbox, drag and drop a FileUpload object inside the aspx code
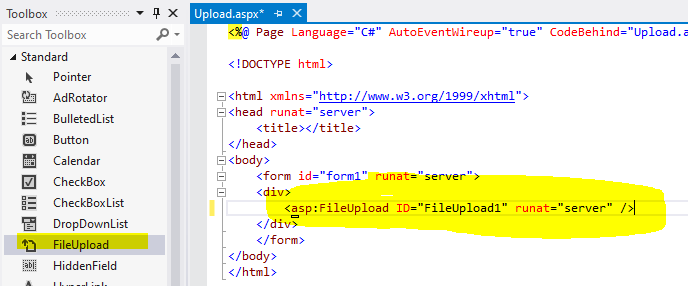
We want to have something like this:

With this object, the user will click on “Browse” then he will have the option of choosing an excel file from his own filesystem.
ADD BUTTON object.
On the toolbox, drag and drop a Button object inside the aspx code

We will have to add a event method for the button, it means that when the user click on the button a method will be launched.

Now we will work on cs file.
We will add the method below to the cs file.
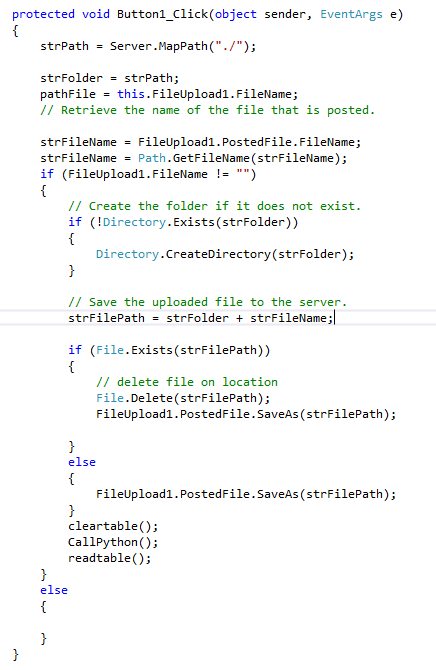
This method will get the path defined on the Upload File object and start the process to run a Python Program.
Note that when you choose the file on the object “FileUpload” you only specify a string which contains the full path to a file, but you only take some action about this file when you click the button “LOAD”.
When you click the button “LOAD” the process will:
1 ) Get the path + filename specified by user;
2 ) Save excel file on the server filesystem;
3 ) Call a method to clear the database table;
4 ) Call a method to start a python program to read the excel file;
5 ) Call a method to show the contents of table on the webpage.
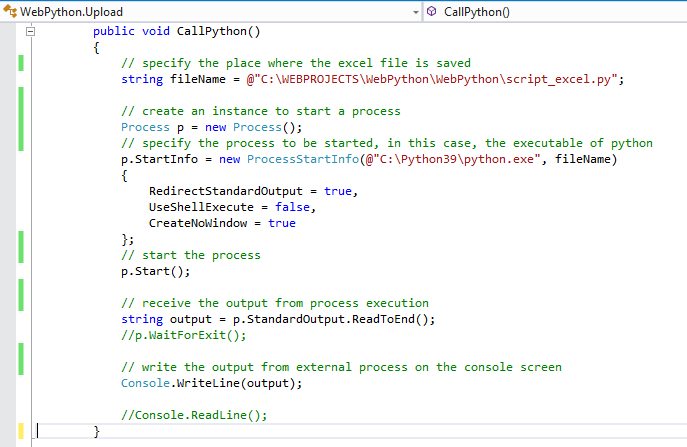
2 – Python Program
2 – Calling Python Program on C Sharp
On the code below we have the commands to start an external process on the local machine. Note that the most important points in this method is to determine the place of the excel file that will be used and the full path of the python executable which will read the excel file.
3 – Python Program
About the python program to process the excel, we have all details on the post Python – Inserting data from Excel file into Database table
4 – Clear Table
Before Python inserts data into the table, we will clear all data.
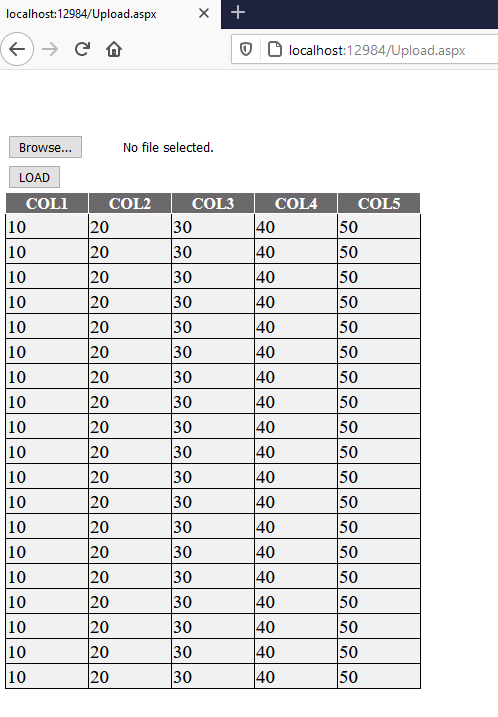
4 – Show results on Page
Since we know that the python program readed the excel file, changed its contents and save them into a database table, now we will access the database to read the table and show its contents on a Gridview.

So we have the results shown on the webpage. Note that all numbers that you see in the gridview below are the same nuumbers of excel file multiplied by 10. I know it may be look silly, but the intention here is to show the interoperability between platforms.
I hope it helps you.
Have a good day!! 🙂